On Demand Video
$2.99
1973 to 1985 Steering Wheel Removal and Replacement - On Demand Video
Learn the procedure for doing this job properly
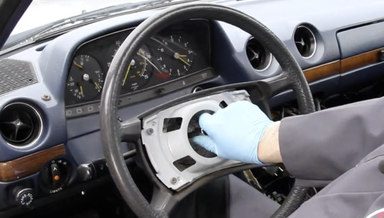
In this video Kent shares his technique for removing a padded steering wheel on most 107, 114, 115, 116, 123, 126, and 201 to 1985 chassis. These are the models WITHOUT an airbag.