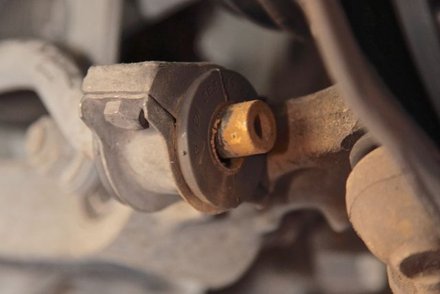
The outer rubber bushings on the 201 124 129 and 210 chassis tend to wear out at 100 thousand plus miles. If you are experiencing any clunking noises in your front end be sure to check these bushings. Worn bushings will also cause your car to “roll” or tilt more during fast or hard cornering. These are inexpensive and easy to replace yourself.


Problem & Solution
Common among these chassis:
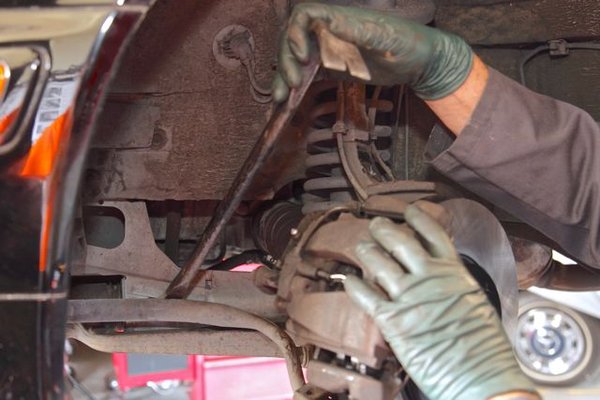
Watch Kent's Quick Tip Video to determine if you need to replace these before you get started: DIY Car Repair Quick Tip #4: Rubber Suspension Bushing Inspection You will only need a correct sized socket and some other simple hand tools to do this job and you will be amazed at how much better your car will handle! The key to getting them on and off easily is using a long pry bar to be able to pry down on each end of the sway bar while removing and installing the bushings.
Here are step-by-step instructions:
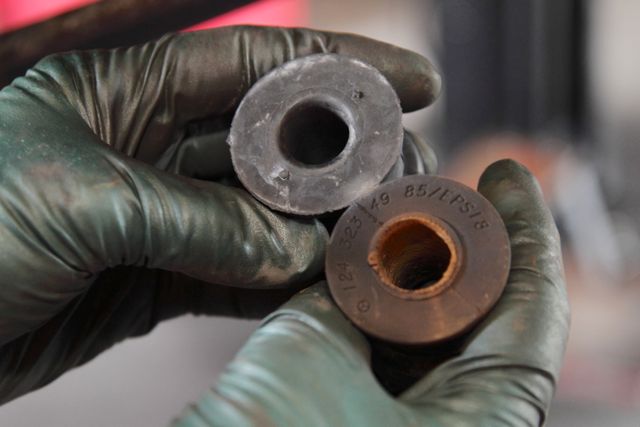
Step 1: Inspection- Look for signs of an elongated hole or rust. Rust is a good indicator that the bushing is worn.
Step 2: Bolt removal – Remove the two bolts using a 13mm socket.
Step3: Pry the cover plate off. The sway bar is under upward tension and will not drop down on you.
Step 4: Use long pry bar as shown to flex sway bar downward so that it is no longer under tension.
Step 5: Carefully pry downward and remove old bushing by pulling straight off the bar.
Step 6: Inspect cover plate for corrosion.
Step 7: Clean cover plate with scraping tool or sandpaper until smooth. Apply silicone spray or silicone grease.
Step 8: Apply silicone spray or grease to both sides of the new rubber bushing.
Step 9: Pry downward on sway bay and install new bushing, releasing tension on the pry bar.
Step 10: Apply thread locking compound to the two short bolts.
***Important: the new bushing is larger in diameter than your old bushing and may at first appear to be impossible to install. Follow the next steps carefully for a successful installation.
Step 11: Push cover plate upward and begin installing rear bolt first. Only screw in approximately two threads or you will not be able to start the front bolt.
Step 12: Use a pair of pliers to squeeze the forward part of the cover plate up tight against the sway bar mount. You should be able to feel the rubber compressing.
Step 13: Remove the pliers and push up hard against the cover plate and attempt to install the front bolt. You should be able to get the bolt started by hand. If not, you may need to use a pair of needle nose pliers to squeeze the plate tight to the bracket.
Step 14: Tighten the two bolts evenly, moving from one to the other until they both bottom out.
Step 15: Securely tighten both bolts. Double check your work.