CPR for a 6.9 - Kent Bergsma's Newest Rescue Attempt
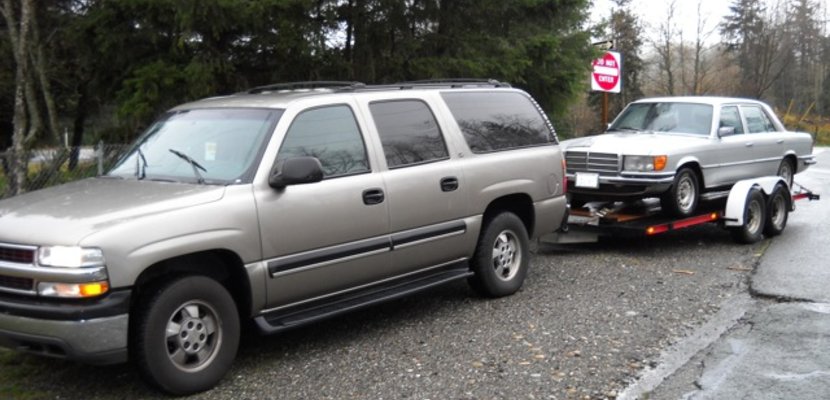
I had decided a year ago that my days of restoring old cars were probably over. I don't seem to have the energy I once had and with all that is going on in the this business every day, I hardly have time to do oil changes on my numerous daily drivers. But no matter how hard I try, I just can't seem to rid myself of the desire to rescue another special Mercedes. And so it has happened again. Look what I trailered home on November 22. It is a 1978 450SEL 6.9 (European model) with classic Euro bumpers, headlights, and velour interior. This baby has 289 horsepower (39 more than the U.S. version). Absolutely no restrictive smog controls. Came from the factory with heated front and rear seats, power reclining rear seat, ABS brakes, and hydroneumatic suspension.
Let me tell you the story (beginning December 1, 2009).... Last update August 28, 2010
The car was advertised locally on Craigslist in October of 2009. One of our customers sent us a link and thought I might be interested in taking a look. At first I thought no way, but just could not get it out of my mind. Now the one thing that really intrigued me was it was a Euro grey-market car. On the other hand I have a number of Euro models in the past and they have ALL been rusty. If the car does not get out of Europe very early in life it gets exposed to road salt and that raises havoc with the lower body panels (especially those that have been heavily undercoated). The undercoating does more damage than if the panels were just painted metal. That is because the salt moisture gets under and trapped behind the undercoating. Since the affected areas can't easily dry out, corrosion just begins its long and aggressive attack on steel parts. On some Euro models, you can peel away the heavy undercoating and the sheet metal that was once behind it will be gone!
The very first question I asked when I responded to the add was concerning rust. I asked the owner to carefully inspect the rocker panels, under fender wells and under body panels. He came back and said they all looked pretty clean. ;I decided it was worth a trip since it was only about 90 minutes away. On a sunny Sunday afternoon my wife and I headed out on a road trip. Upon arrival the owner and a couple of his buddies were trying to get the engine started. It would just crank and crank without a pop. It was getting good spark but obviously no fuel. As they were messing with the engine I walked around the car and opened the doors and trunk. It only took two minutes for me to determine this car would be worth saving. It had the perfect color combination for a 6.9 - Silver with blue cloth interior. (Have you ever seen a brown or tan 6.9?) The interior was in very good condition for its age - good burl wood and no cracks in the dash. And can you believe front and rear heated seats and the rear seat power reclines! Checked for rust - very little and easily repaired. Body very straight and good chrome. Even the paint was acceptable for a driver. Here are the pictures I took of the car on that initial inspection:
.jpg)
.jpg)
.jpg)
.jpg)
.jpg)
Since the seller could not get the engine running, I made an offer to purchase the car as is. I know I was taking a risk but figured I could always part it out. After a week of mulling it over the seller accepted my offer and I hooked up the trailer and headed south. It took a strong winch to pull this heavy car up on the trailer. Within 4 hours I was back home and had the car unloaded at my shop. I knew the brakes were dragging but did not realize how bad until to tried to get the car off the trailer.

After looking the car over a little more thoroughly i realized the project was going to be typical to a lot of other cars I have hauled home (flash back to high school and my 1934 Ford that had been sitting out behind a farmers barn) over the years. Cars that have been sitting for long periods and not driving tend to have very similar problems. The challenges to "wake them up" and get them driving again tend to fall in to a set pattern. This 6.9 has proven to be no different. Always expect to have problems with the brakes and the fuel system. With that in mind, don't put any more money into the car than you absolutely have to to get the engine running and the car driving down the road. In most cases your No. 1 priority should be to first determine the health of the engine and transmission. That is exactly what I intend to do with this car. Follow along over the next few weeks as I try to determine if I have a keeper or a parts car.

From day one I knew I would not be able to push the car into the shop until I freed up the brakes. All four wheels were dragging and even with three of us pushing we could not move the car far. Rear brakes are pretty easy the free up. Remove the rear tire and beat on the outside edge of the rotor. Since the rotor is loose on the hub this will move the pads in just enough to get the wheel to rotate. Make certain the emergency brake cables have not frozen and locked the emergency brake shoes to the inside of the rotor hub.
.jpg)
To free up the front brakes I had to remove the pad pins and springs and pry the pads out against the caliper pistons. I was eventually able to get both front rotors to spin freely. Note: When you do this just remember to avoid pushing on the brake pedal or you will have to do it all over again. I used only the emergency brake as I moved the car around and onto the lift. I looked the tires over carefully when I had the wheels off. Sure enough I could see signs of weather checking and possible cord delamination. ALWAYS replace the tires if the car has sat for more than a year - even if they look ok. I have seen too many problems with old tires. It is just not worth the risk. Can you imagine driving a 6.9 on old tires!

Once the car was on the lift and up in the air I was able to give it a good looking over. Note the unique suspension. There are no springs! Rust proved to be quite minimal considering it is a Euro model. In the next two pictures I will show you an example of what I was taking about concerning the problem with body undercoating. Notice the first picture below. The rocker panel and jack point look pretty good - don't they? Look a little closer. The clue is the split in the undercoating along the bottom edge of the body pinch weld. Note just a small amount of rust is showing in the crack. That is all it takes for moisture to get trapped and for rust to do its handy work. Now look at the second picture as I begin to pull away some of that undercoating. Not a pretty sight, but this has been caught early enough that I can repair it as good as new with Miracle Paint.


I also talked about exposure to road salt. You are probably wondering how one can tell if a car has been subjected to road salt sometime in its history. For older Mercedes there are sure signs. Their cars use a lot of cadnium plated parts under the car ( bolt and screw heads, brackets, clamps, hose fittings, etc). These parts are not painted or otherwise coated. Cad plated parts hold up ok to water but not water mixed with salt. The next picture will show an example of a badly rusted clamp along the emergency brake cable. A sure sign of salt damage. In the following pictures you will also see evidence in and around the fuel pump mounting area. NOTICE: In the future I will be doing a separate page on how I approach this the rust repair on this 6.9. This is all typical rust on 116 and 123 chassis.

For the time being the rust repair will have to wait. Fixing the brakes must also take a back seat. As I mentioned above, the number one goal will be to get the engine running before I spend any significant time or money on the car. That means the fuel system must be attended to first and that needs to start with draining out the old gas, cleaning the fuel tank screen filter, and rebuilding the back fuel delivery components. Take a look at the following picture. You can see I have my work cut out for me. Note the rust on all the cad plated steel parts. Another sure sign of exposure to road salt. This is not a pretty site and it is obvious I am going to need to buy some new parts just to make sure I am getting fresh fuel from the tank to the engine under adequate flow and pressure.
.jpg)
The rear shock mounted fuel delivery system includes the tank screen, take outlet hose, fuel pump, fuel filter, check valve, fuel accumulator, bracket assembly, mounting rubbers and numerous hoses and fittings. After looking it over carefully it became obvious that it was better just to bite the bullet and repair this system properly rather than piece meal it. I knew it would mean putting more money into the car than I really wanted to just to get it running, but if I didn't do it right from the start I would end up doing it all over again. A number of the fuel hoses were rotting or kinked and even some of the fuel hose clamps were nearly rusted through. The mounting rubbers were torn and some of the hose fittings were badly rusted. With very old gas in the tank and filter I knew there was a good possibility I could be dealing with major fuel restriction issues. First goal would be to drain the fuel tank, pull the components and remove the fuel tank figure screen. Note above I used a large hose clamp to restrict fuel flow when draining the fuel out of the tank. This is a must or you will have gasoline spraying all over the place. Be sure to unhook the battery, have a fire extinguisher close by and do not do this is a confined space. Wear a good quality spray painters mask. Old gas fumes can really get to you! RECOMMENDATION: Before you start taking everything apart take a few digital pictures. It will sure help you remember how every goes back together.
.jpg)
.jpg)
When I was draining the tank I was surprised by the low rate of fuel flow from the outlet hose. It took so long to drain the 10 gallons of old fuel, I knew I was going to find some type of problem in the fuel tank. Removing the tank screen required a very large socket. I have designed a custom socket that makes it easy to remove the tank screens common on many older Benz.Search for fuel tank socket to learn more about this tool. Just take a good look at the old screen! The entire lower half was almost completely plugged. The tank itself turned out to be quite clean inside. What you see is not dirt. It is a crystal type substance produced as a byproduct of stale gas. In diesel cars this will commonly be a black substance produced by algae in the fuel tank. I decided rather than attempt cleaning of the old screen I would just install a new one along with a new o-ring seal.

.jpg)
I had to be very careful as some of the fuel line fittings were very rusty. I used PB blaster and in the case of the feel hose connector shown above, I let it soak overnight. The next day i used a high quality flare nut wrench to break the line nut loose from the flexible hose. With all the old components and hoses removed, I installed a new tank outlet hose and a new feed connector hose as shown. These should be installed before replacing the pump and filter bracket assembly. You have a lot more space to work your wrenches on those hose fittings with the other components out of the way. With that done, I turned my attention to those other components. I tested the fuel pump and since that sounded ok I decided not to replace it. I did, however, purchase a new check valve, new fuel filter, new rubber mounts, new accumulator and all new hoses and clamps. But before I put all that together I had a little rust I wanted to deal with.


As you can see the bracket assembly was very rusty. I also wanted to stop the corrosion that had already started on the frame under the bracket (above right). If you have never used our Miracle Paint products you must give them a try. This is the only type coating you can use on this type of rust that will produce both quick and permanent repairs. I have no desire anymore to spend hours sandblasting a part like this, then spraying it with epoxy primer and top coating it with two part paint - especially on something that no one will ever see! Miracle paint loves to stick to rust. You only need to wire brush off the loose scale, clean and coat with a paint brush. I went to work on this bracket assembly and the frame member over the rear axle. In less than an hour I had them cleaned up with a wire wheel, coated with Miracle Paint and I was done. The next day I was able to assemble the new components into the bracket in preparation of installation.
.jpg)
.jpg)
Miracle Paint to the rescue again! Note, I even touched up some of the surface rust on the hydraulic lines. To check out our full line of Miracle paint products use the search box. Look at the difference in the bracket assembly! I installed all the components on to the bracket assembly first. I left the fittings and clamps loose so I could make minor adjustments once it was bolted in place. Note the new rubber shock mounts have already been mounted to the bracket. Once bolted in place and aligned, I tightened all the fittings and hose clamps. Now I could feel the excitement. I wanted to get this engine running!

After double checking all hose fittings and clamps for tightness, I poured 5 gallons of fresh fuel into the tank. No leaks detected! I decided there was one more thing that needed to do before attempting a start-up. I knew I had better take a look at the fuses in the fuse box. Over the years, I have seen so many problems with these old fuses I knew I would be remiss if I ignored them.


I was not disappointed. True to form, I found some really disgusting fuse connections. I generally have been impressed with German engineering, but in my opinion these fuse box designs were a big mistake! I have been around aircraft a good part of my life and have become intimately familiar with the problems associated with dissimilar metal corrosion. You can not put an aluminum fuse in a copper alloy holder and expect it not to corrode over time - especially in high moisture environments. Take a look above at the end of the fuse I removed from the holder (upper left). Even though the fuse appeared to be ok, the aluminum tip was gone! If you have an old Mercedes and have not done a fuse box service - do it ASAP with the special alloy fuses we offer on our website. Use the search box to view our fuse upgrade kits.


I removed all the old fuses, thoroughly cleaned each contact point with a brass wire brush, and installed new style fuses. This took a little time, but I want to assure you that it is always well worn the effort. The $10 to $15 and 45 minutes you will spend doing this could save you hundreds of dollars in mis-diagnosed repair costs. You can not believe how many electrical problems I have come across that have been solved just by doing this easy fuse box service. And don't forget fuses are sometimes located outside the main fuse box (as shown with the fuel system aux fuse holder shown above and to the left). One more thing i knew I had to do before attempting that start. Now I was really getting close!


The fuel lines needed to be purged of old gasoline. I unhooked the main pressure hose attached to the fuel distributor, placed the end in a plastic bottle, got into the car and started cranking the engine over. In a few seconds fuel started to squirt into the bottle and after cranking for about 15 seconds I could see fresh fuel squirting into the bottle. Next, I removed the fitting attached to the distributor body housing. Inside is a small mesh screen designed to prevent any foreign particles from entering the fuel distributor. I soaked the screen in carb cleaner and thoroughly blew it dry with compressed air. The fitting and fuel line were reconnected. I nervously got back into the car and reached for the key.
To my amazement the engine turned over about four compression strokes, immediately fired and settled into a strong steady idle! Not even a hiccup... I could hardly believe my good fortune. I let it run a couple minutes to monitor oil pressure and temperature and stepped outside the car to check for fluid leaks. Even the exhaust was running clean with no evidence of engine smoke. For me the most exciting moments in acquiring an old project car have always been 1) Discovery and acquisition 2) Getting the engine running 3) Driving it down the road for the first time. I could hardly restrain my desire to get in and hit the road, but I had more work to do first.
I had no idea how old the engine oil was and did not want to run the engine any longer than needed before I changed it. With the engine slightly warm, the car was hoisted back up into the air and the oil drained. It just keep coming and coming .... Finally filled up my drain pans, changed the big filter and poured in 13 quarts. Check out the picture below. Can you spot the oil filler cap?
.jpg)
Before taking it out on the road I decided to take care of a couple obvious hydraulic suspension fluid leaks. Both rear strut high pressure hoses were weeping fluid from the inside out. This is not uncommon with this 30 year old hose. I had one new hose that came with the car and the other hose was fabricated using the existing end fittings and a new length of compatible pressure hose (note the special tool I used to compress the end fitting enough to get the threads started).


It was time to hit the road. I knew the brakes would be a problem but my plan was to drive it just far enough to check out the transmission, suspension and rear end. Once again, this would be a key test to determine how much more time and money I would want to put into the car. I lowered the car back on to the ground and fired it up and let it run at 2500 rpm to build up hydraulic pressure in the suspension system. Within 3 minutes the car started to slowly raise up. As I drove down the gravel driveway I tested the brakes a few times. They were working but not as well as I would like and I also noticed the throttle was sticking and not coming all the way back to idle. As much as I wanted to turn on to the highway and punch it, I knew I was going to have to hold off the temptation. I pulled on to the main road and gently pushed on the throttle. The car immediately accelerated to 45 mph and smoothly shifted through the gears. No noticeable rear end noise was noted. The car was riding level but a little rough - a sure sign of failed accumulators. Half a mile down the road I decided I should pull off the road and check the brakes. Two of the wheels were already getting warm. I was not comfortable either with the sticky throttle, so I decided it was prudent to cut short its maiden voyage. I was extremely happy though, as I pulled back into the driveway! SUCCESS... my gut was telling me that this 6.9 was going to be a keeper and worthy of restoring.
It was time to get it back on the lift and order those new brake parts. New rotors, pads, brake hoses and rebuilt calipers were ordered. To do this right I had to replace the rotors, calipers, pads, and flexible brake hoses. Until I got those on the car I would not know the condition of the master cylinder or brake booster. Of course when I replaced the front rotors I carefully inspected and replaced the front wheel bearings. Rear wheel bearings and rear emergency brake shoes checked out ok. If you would like to learn to repair your own brakes please refer the the other resources I have available.
Introduction to Complete MBZ Brake System Service and Repair Resources
MBZ Brake Systems Troubleshooting Inspection and Repair Manual by Kent Bergsma
It was a challenge to bleed these old ABS brakes without damaging the master cylinder. There were some leaks in the master cylinder reservoir so pressure bleeding did not work. If you are not familiar with the multiple ways to bleed old car brakes I have written a manual full of tips and illustrations.
Brake Bleeding Equipment and Procedures Manual and Bleeder
After a half days work I had all the new parts on and looking good. Note the wheel alignment pin that I have installed on the front rotor. I use that to line up and mount the alloy wheels. The wheel just hangs on the stud. Sure beats trying to hold the wheel in place with one hand while trying to start a lug bolt with the other! Car was lowered and wheel lugs properly torqued. After another test drive - the brakes were working great buy the suspension still felt like ridding on a buckboard! Now it was on to some serious suspension work.


