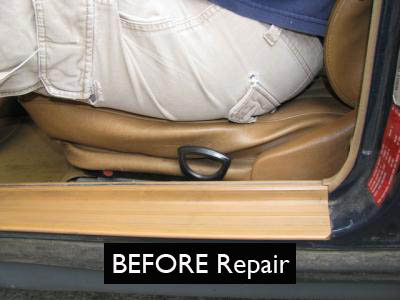
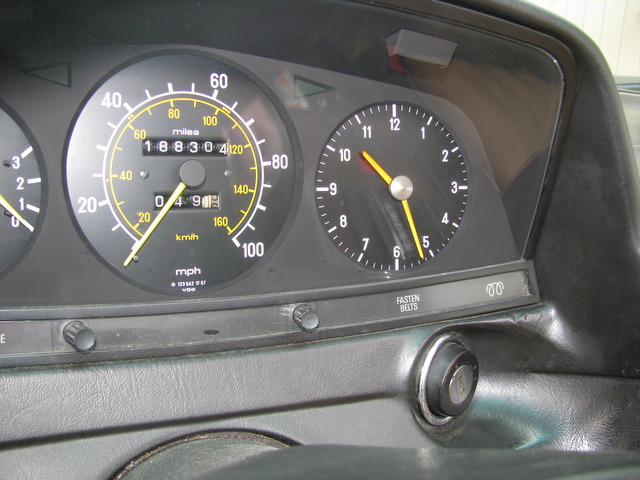
Broken down springs on 116, 123, and 126 chassis front seat bottoms are so common on older Mercedes that Kaia finally convinced me I just had to do something about it! And by something I mean more than just using pool noodles, plywood, blocks of wood, wads of bubble wrap, or heavy dense foam chunks. It use to be that you could find a good right side seat spring and install it in the drivers side. But all these used seats in wrecking yards are drying up and new seat springs are $320+ dollars for one bottom. Every one seems to be asking for a solution. One customer recently wrote to tell me he had to switch his wallet to his other butt cheek to compensate for the sag!


Problem & Solution
Common among these chassis:

Are you tired of driving your old Benz with a broken or tilted front bottom seat spring? I know how I feel when I get into a customer car and have to test drive it with a bad drivers seat! Wow - ruins the otherwise pleasure of driving a Benz. So I recently set out to come up with a repair kit that would allow the owner to fix the broken springs and to beef weak areas in the seat by installing additional springs. It has to be easy to install with no special tools and inexpensive. I am threatening to call this my Half Ass Seat Repair Kit.... Dont know for sure if I am going to be successful at finding a good solution Trying to find an easy and inexpensive solution has been a real pain in the ..... Station wagon rear ends are not the only ones that need help!
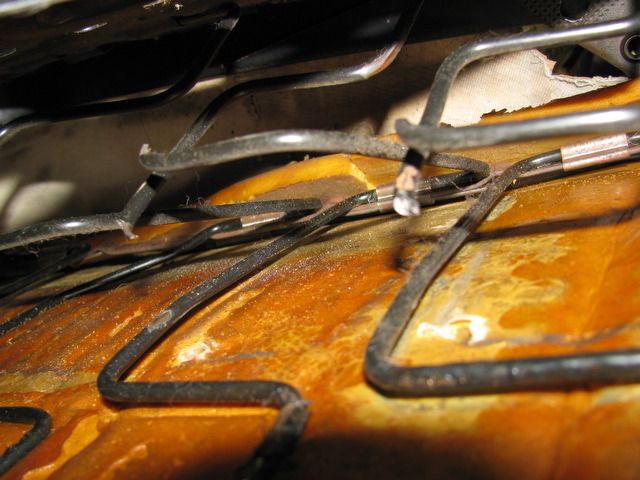
Torsion springs always break at the bends as shown below (under very heavy loads) and can not be welded back together. After working on the problem for three weeks it became obvious I would need to find a way to repair the break in each spring. Since each spring is tied together across the seat and work in tension, torsion as well as compression - one break can cause a major support failure in the entire seat. I also found I would have to add additional spring steel to the weakened area in order to restore the area around the broken spring to its original strength. Some things I tried were just too difficult. Other repairs required special tools and removal of the seat cover and padding. My goals were narrowed down to the following:
- Kit must be inexpensive
- No special tools required
- Easy to install by the average DIYer
- Most repairs done without removing upholstery
- Multiple options within kit to repair different types of seat springs
- Repair had to fix the breaks, be strong and lasting
- Repair to be done in two to three hours for most seats
This was a tall order and by the end of week four I was ready to throw in the towel. Everything I had tried was just not meeting my objectives. Well, at least I tried....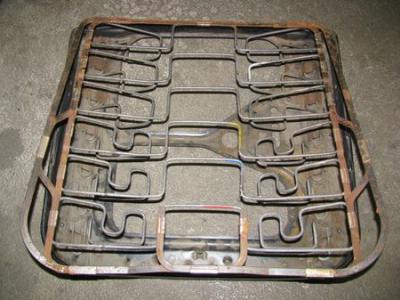
AUGUST 15 UPDATE:
I woke up one morning last week and the possible solution came to me. I could hardly wait to purchase the necessary parts and hardware to try out my idea. Within a few hours I was actually beginning to think it might work. Within a couple days I had worked on some of the problems and was ready to do a "live" repair. Kaia had been driving her 300TD wagon around for the past year with a broken and collapse lower drivers' seat. It was time to give her a lift.
OPERATION ELEVATION:
On Friday the 14th we rolled her car into the shop. I noted the time when I began the repair. 10 am

Check condition of seat. Lots of sag around the middle and it made a snapping noise when pushing up and down on it.
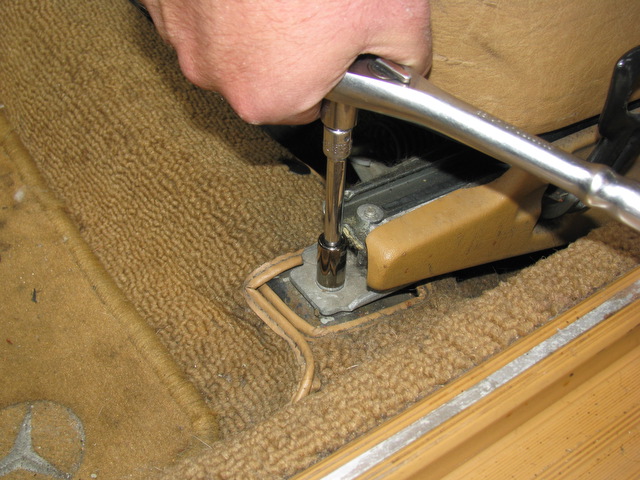
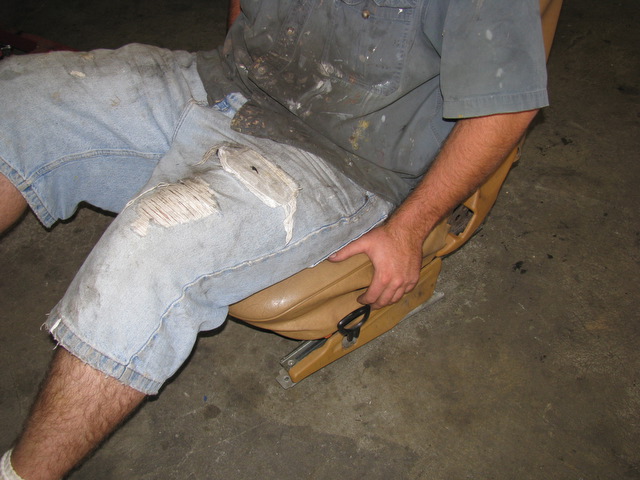
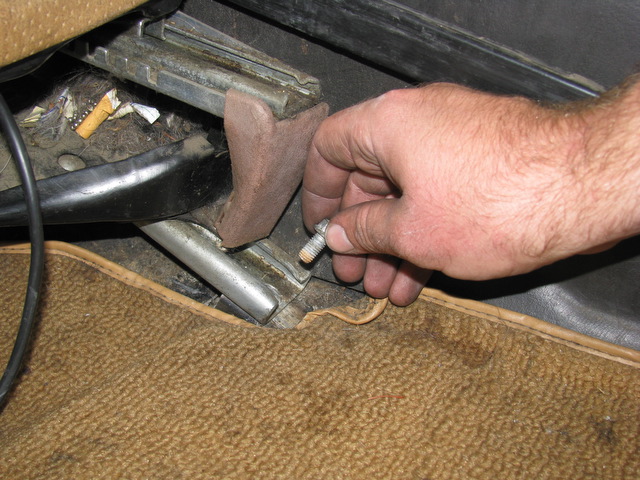
Four bolts removed and seat lifted out of car and placed on workbench.
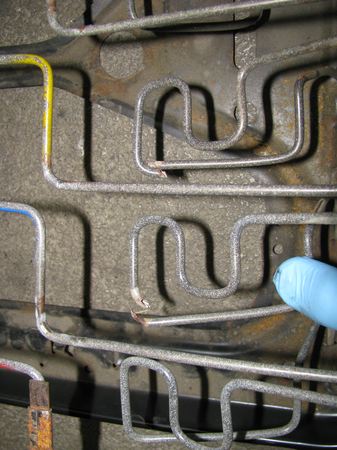
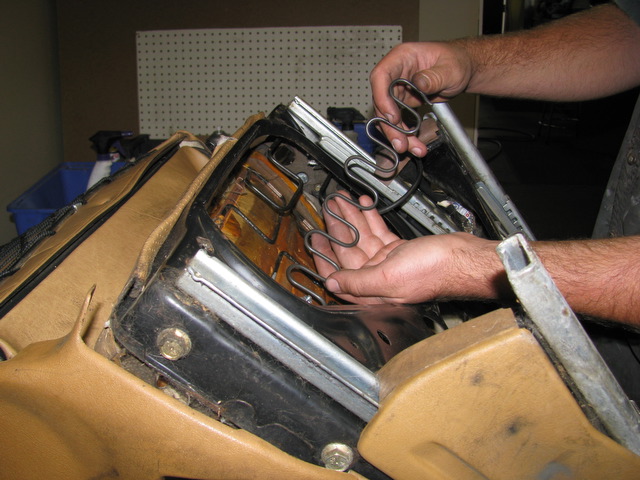
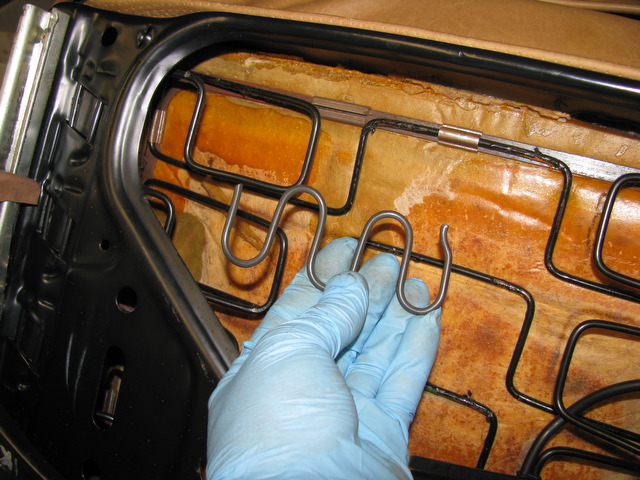
Seat spring was found to be broken in two places in the middle left side (note common break points).
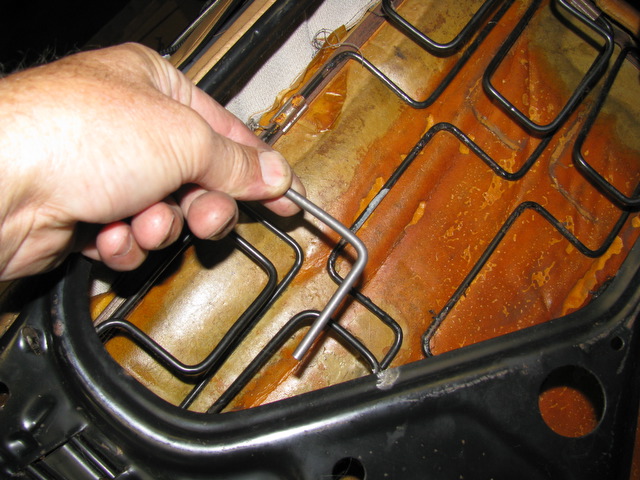
Spring steel splices were added to repair the break points. (Repair attempted without removing pad or cover).
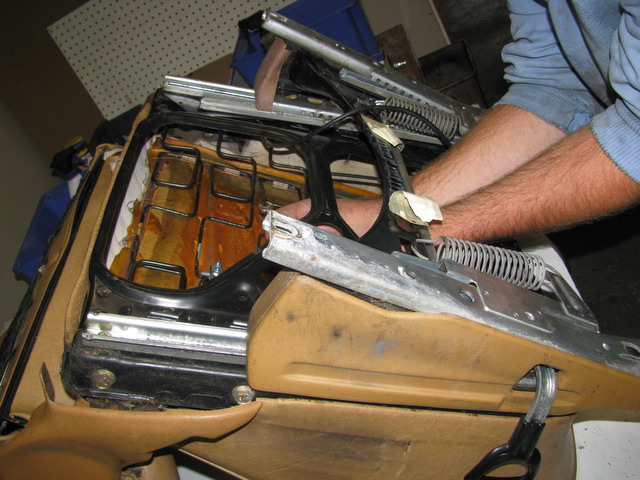
It was tight working in the confined space but worth the effort to keep from having to remove the upholstery.
Reinforcement springs were added to strengthen the fatigued and weakened springs after splices were completed.
Seat was tested on the floor at least 10 times and modifications made until "feel" was just right.
When satisfied with the results seat was reinstalled into the car and tested again for firmness and height.
Checked clock and total time to remove, repair and reinstall was 2 hours 15 minutes.
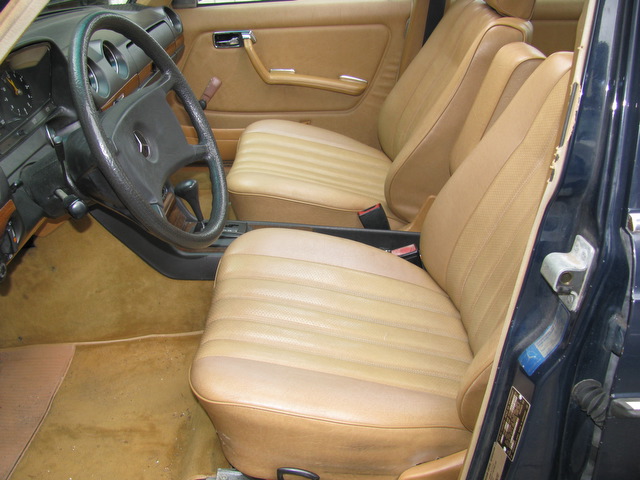
Car was test driven and results were significant. Right away I had to readjust all the mirrors on the car since I was sitting about two to three inches higher! When I gave the car back to Kaia she exclaimed, " Wow, I can easily see over the steering wheel now and it doesn't feel like I am sitting on the floor. " As you can see she is now one happy camper riding pretty...

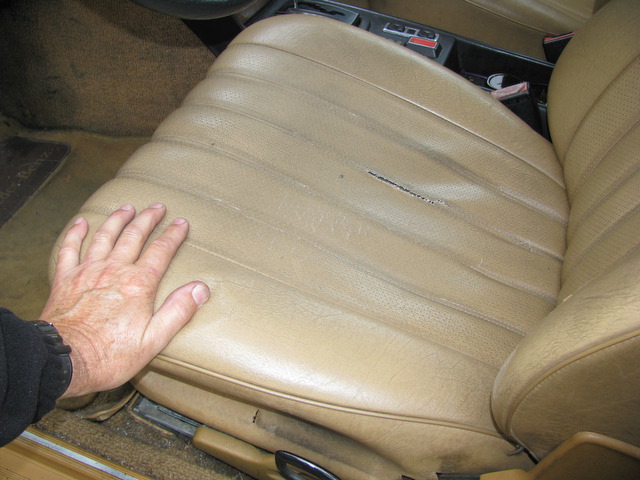
NEXT SEAT PLEASE: O.K. One test done with very successful results. Decided it was time to do another seat from a 123 240D. Friend had been complaining about his seat rocking and tilting for a couple years but was not ready to cough up the $500 to $600 to get a new spring installed. So I asked him if he would like to be a test bed (or should I say seat). Just look at how badly his seat was sagging. He wanted me to get to the bottom of this right away so I told him to bring it out to the shop. While taking the picture shown below it became obvious this was going to be a full ass repair....

Once again I noted the time. I wanted too see if we could do this repair faster than the last.
First we had to get the seat out of the car. After loosening the four bolts seat had to be lifted forward to free it form the plastic belt bucket guide.

This seat had only one broken spring. Pretty amazing that one break could cause the seat to collapse so badly. It was obvious the other springs on that same side were fatigued.

After the break was repaired additional reinforcement springs were added to beef up the left side of the seat.
Seat was reinstalled back into the car. What a difference! Even just looking at it you could tell it had been given new life.
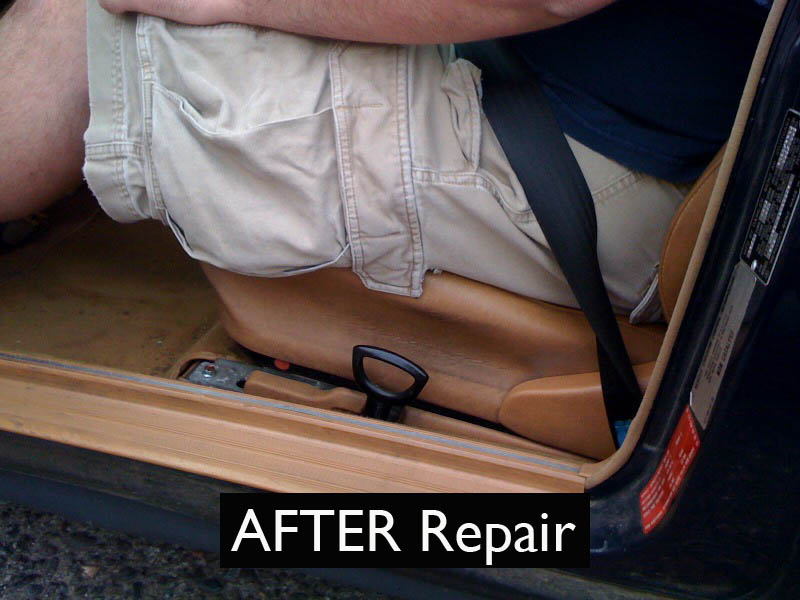
Now for the real test. Take a look at the difference. The owner could not believe how much higher he was sitting... and the noise and the "roll" of the seat from side to side had been eliminated.
Noted time of completion. From removing the first bolt to completing the final sit down test it only took one hour and thirty minutes. And the customer was super happy because I did it for free!
Look at the smile on his face. After driving it for a half hour he just could not stop talking about the difference it made in his driving enjoyment. Now his head is up where he can see where he is going. I love happy customers... KB
