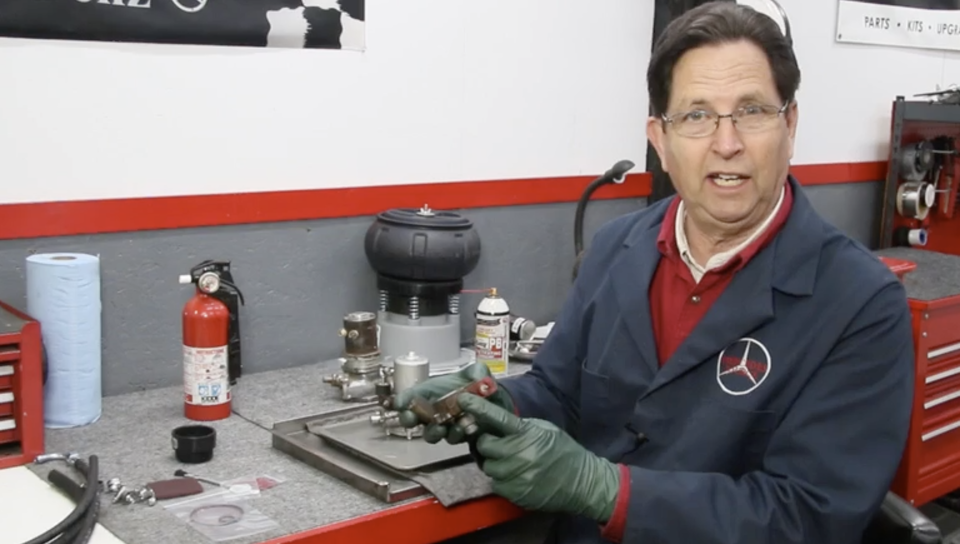
MFI (mechanical fuel injection) fuel pumps are notorious for leaking fuel. Leaks are almost always due to age hardened and deformed o-rings inside the pump. Taking the pump off the car, taking it apart, cleaning it and installing new seals will almost always solve the fuel leak problems. In some cases it will even get your fuel pump running again. They do get "stuck" from old dried and varnished fuel inside the pump. This video will only cover resealing the "short pump." It was used on most all models from 1967 to 1973 (except the 3.5 and 4.5 V8's). It was also used on the early 230SL and 250SL. To be sure get under the back of our car and look to confirm what pump you do have!
Get it for Free! This is available as a free add-on item. Review the product details for bundle options.
Product Details
Video Preview:
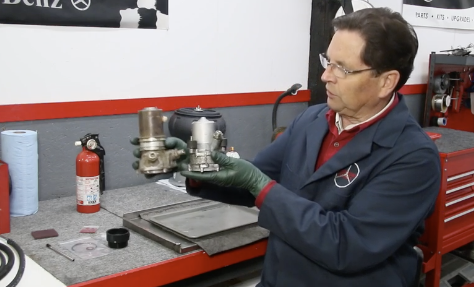
Difference between the long and short pumps:
If you decide to purchase our full reseal kit then this video instruction is included free of charge. PLEASE SEE related products below:
This is a long and detailed video. The following procedures are covered:
- Example of a “short pump”
- Where the leaks occur
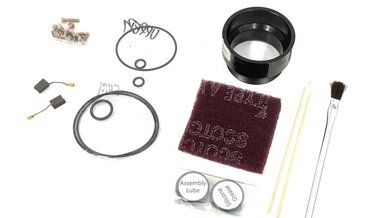
- What the full reseal kit covers
- What if the pump does not run
- Other items you should order
- What to do it the electrical wires won’t come off
- Tips to removing the pump from the car
- Minimizing potential for fuel spills and gas down your arm
- Special tools shown for pump removal
- Importance of having a fire extinguisher
- Draining the pump once removed
- Removing the bracket and rubber mounts
- Removing the finger screen and check valve
- Tools needed
- Removing the bottem plate and center section
- Supplies to have on hand
- How to prevent damaging the straight slot screws
- How to hold the pump upright while working on it
- Removing and marking the bottle plate
- Removing the lower o-ring
- Removing the center section
- Removing the other two o-rings
- Best way to clean all the parts
- Orientation of center section to upper case
- Preparation to reassemble the pump
- Assembling the upper o-rings and center section
- Tightening sequence
- Installing pump vane, bottom ring and bottom plate
- Tightening the bottom screws
- Reinstalling finger screen, check valve, and mounting bracket
- Importance of installing new fuel hoses and clamps
PLEASE NOTE: Detailed step-by-step instructions for removing and reinstalling the pump are not included in this video. Kent will only share some tips on removal and how to minimize fuel spillage. Pump removal is straight forward but Kent highly recommends you plan on replacing the old fuel hoses while doing this job.
Total Run Time: 49:30
How to view this on-demand video:
Once you complete the purchase of this video you will be able to view it immediately when you are logged in and on your personal account page (click on My Account). The video(s) will show up under My Video Manuals. The video is NOT downloadable to your computer or mobile device, but you will be able to view it anytime, from anywhere and from any device as long as you have internet access and you are logged in to your account at mercedessource.com.
Important note: This video manual may or may not include all the information you will need to troubleshoot and/or repair your specific problem/s. Please read the full description carefully to determine if this video is applicable to your year and model and contains the information you are looking for. If not, please refer back to our "Solutions Finder" and enter your chassis number and the specific problem you are having to see if we offer a solution.
Related Products:
1963 to 1973 Short Bosch MFI Electrical Fuel Pump Complete Resealing Kit
These early “short style” electric fuel pumps are very prone to leaking fuel because the rubber case o-ring seals harden with age. New pumps are no longer available and rebuilt are VERY expensive! If you risk buying a used one it will probably end up leaking or seeping fuel too.