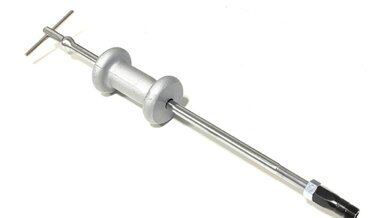
Version 4 update 2/22: New color and style but still does the same job. This is one of the key tools you will need to remove stubborn pre chambers from the cylinder head of your old diesel engine. NOTE: You will also need the collar nut removal tool to get the slotted nut out of the head BEFORE you can remove the pre-chamber with the slide hammer. (see related products below)
Product Details
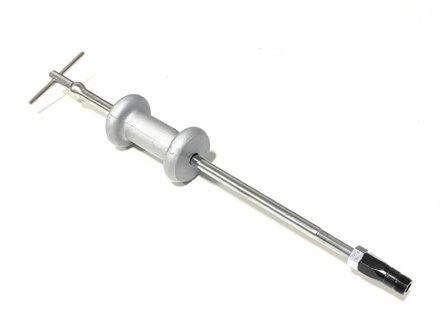
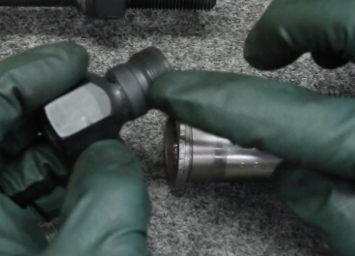
This slide hammer puller includes a special fine thread insert that is installed into the pre-chamber and the slide hammer is then securely attached to that insert. Repeated impacts using this reinforced heavy slide hammer will slowly remove the pre-chamber from the head. This action works to slowly pull the pre-chamber out of the head. ( Please note color of our current to is silver not yellow).
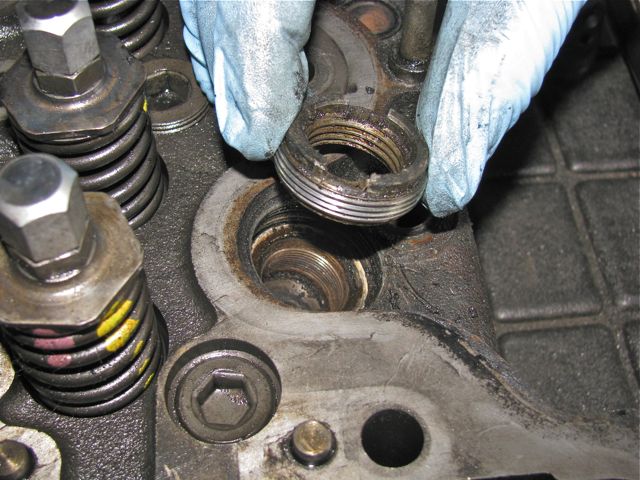
Pre-chambers will need to be removed if damaged or if you need to replace the sealing ring under the upper lip of the pre-chamber. If you have a cylinder that continues to run roughly even after you have determined good compression and proper injector spray pattern - then you may have a problem with the pre-chamber itself. Once remove it is easy to inspect it for damage. Note sealing ring in the picture below:
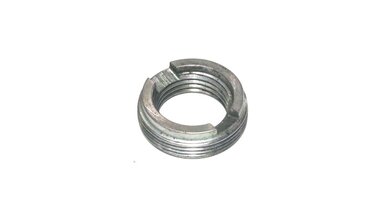
IMPORTANT: To remove the pre-chamber with this slide hammer tool you will first need to remove the collar nut that holds it in place. This will require another special tool. If you don't already own this tool please see related products below to order this tool.
Here is a picture of the collar nut remove from the head:
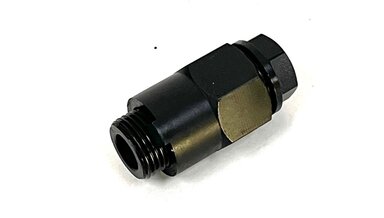
The fine thread adapter fitting included with the slide hammer is shown below. No other attachments are included.
No specific written or video instructions are included, but here is a summary of the steps required to perform this job:
- Remove the injector hard lines and the injectors
- Remove the glow plugs - DO NOT FORGET THIS - you will damage your pre chamber!
- Remove the collar nut (special tool required not included here - see related below)
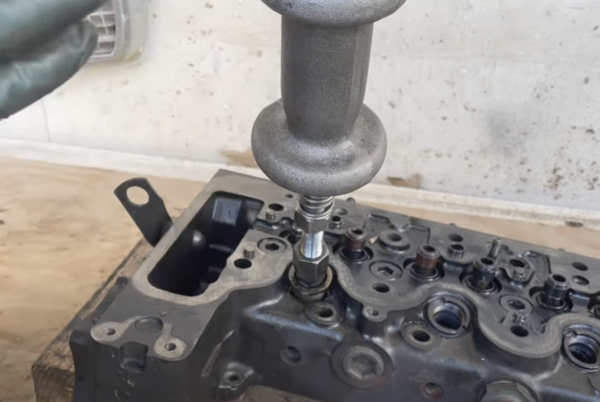
- Install the fitting on end of our new model slide hammer
- Tighten the threaded end of the slide hammer shaft down tight to the special fitting
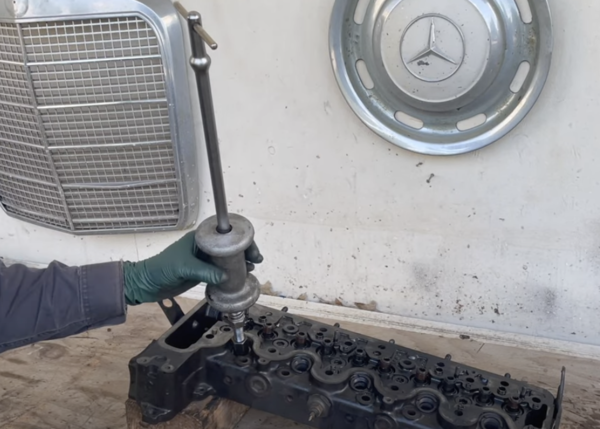
- Multiple upward hard hits of the sliding hammer will be required to pull the prechamber out of the head
- Clean the prechamber thoroughly before reinstalling
- Make certain prechamber is aligned properly when tapping it back into the head
NOTE: If you remove the valve cover and gasket you can use heat from a good electric heat gun to heat the head slightly to aid in removal and replacement of the pre-chamber.
_______________________________________________________________________________
How to view the PDF digital instructions:
Once you complete the purchase of this product you will be able to download the digital instructions immediately when you are logged in and on your personal account page (click on My Account). Any PDFs will show up under My PDF Manuals. You will be allowed three downloads, so please save the file on your machine for backup.
_______________________________________________________________________________
Related Products:
615 616 617 Early 601 and 603 Diesel Prechamber Collar Nut Torquing Tool V2
Tightens and Removes Collar Nuts on 220D 240D 300D 300CD 300TD 300SD 300SDL 190D 2.2 1969 to 1987. Works on most Mercedes diesel engines up through 1987 only.
615 616 617 Early 601 and 603 Diesel Engine Prechamber Collar Nut - USED
This is a genuine Mercedes used part. These are much stronger than the aftermarket ones available. Genuine are no longer made. No damage to the slot or the threads. Only for models listed. Does not work on later aluminum diesel engines. Collar nut holds pre-chamber in cylinder head.
1990 to 1995 Diesel OM602 and OM603 Prechamber Removal Tool
This tool will allow you to remove a cylinder head pre-chamber on a 1990 to 1991 350SD 350SDL (126 chassis), 1990 to 1993 300D 2.5 (124 chassis), and 1992 to 1995 300SD / S350 (140 chassis). The special black fitting attached to the slide hammer is custom made in our shop.