Problem & Solution
Common among these chassis:
From my own experience of rebuilding hundreds of diesel injectors, fuel leaks between the two halves of the injector body are caused by either mixing parts together during reassembly or by not adequately lapping the internal mating surfaces of the injectors. Minor leaks will not show up during bench testing. They usually show up after you have driven the car for a few miles. This can be frustrating since repair will require you remove and open up the injector again.
The solution is to take extra care when you disassemble, clean and "lap" the injector parts.
1. Always keep the parts together from the same injector. Mixing the internal parts will change the pressure settings as well as increase the possibility of leaks. Use a muffin tin or small plastic containers to keep the parts together during the cleaning or rebuilding process.
2. Be sure to thoroughly clean the inside of the injector bodies with a brass tube brush of approximately 1/2 to 3/4 inches in diameter. Clean the injector halves in solvent and wipe dry for inspection. There cannot be even the slightest amount of dirt or contaminants inside the body halves. Even one dirt spec can cause leaks or quickly ruin a new nozzle.
3. Lap the internal mating surfaces using a "progressive lapping procedure."
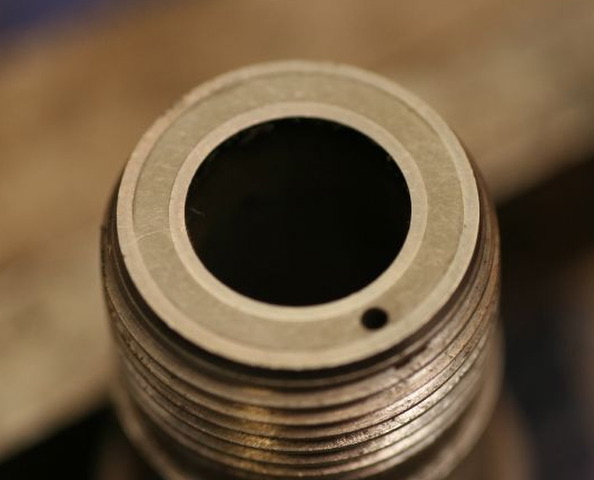
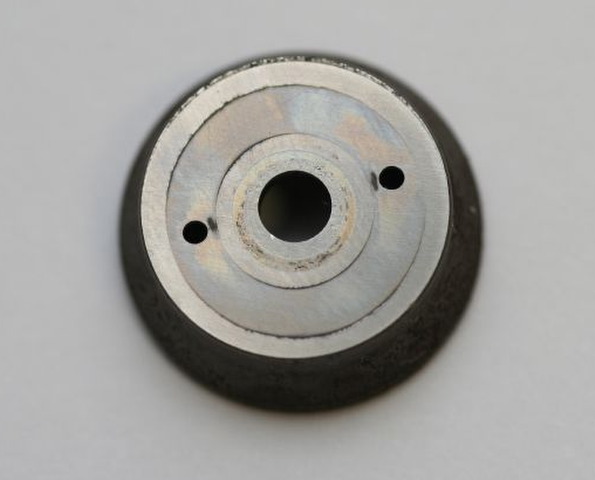
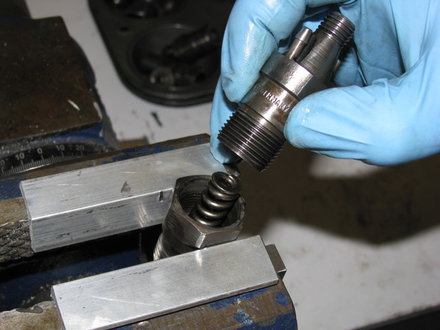
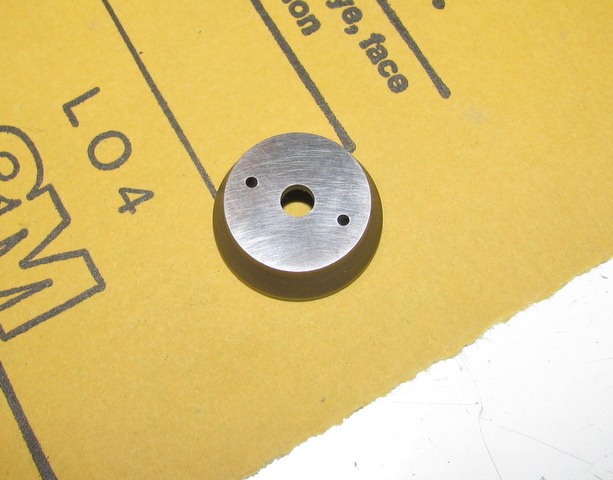
Start by cleaning and inspecting the mating parts. If you examine the bottom of the top half of the injector body you will find ring stains or what appear to be grooves worn into the sealing surface. Likewise for the spacer or "intermediate disk". In order for the injector halves to seal properly these surfaces need to be super flat and smooth. If you assemble an injector without lapping any worn surfaces, it is very likely the injector will leak fuel.

To complete the procedure you will need a flat glass plate and two or three sheets of increasingly finer grades of auto body wet or dry sandpaper (black). Lapping removes metal, so it should be done as sparingly as possible. WARNING: Always use the finest grit necessary to complete the task. Carefully inspect the surfaces for wear marks before you begin. If an obvious groove is evident, you may need to start at 600 grit (or 1000) and work your way up to 2000. If there is only a stain ring a polish with the 2000 grit paper is probably enough. If you are not sure start with 2000. If the ring does not go away then move down to 600 and work your way back up.
The purpose of the glass plate is to give you a very flat surface to sand on. A work bench will not do. If you have machine quality tools you may be able to use a surface on your drill press or milling machine. If you don't have glass around your home, go it any discount store and buy a cheap 5 x 7 picture frame with smooth glass. Throw the frame away and keep the glass for future lapping needs. You should have on hand 600, 1000 (or 1200), and 2000 grit sandpaper
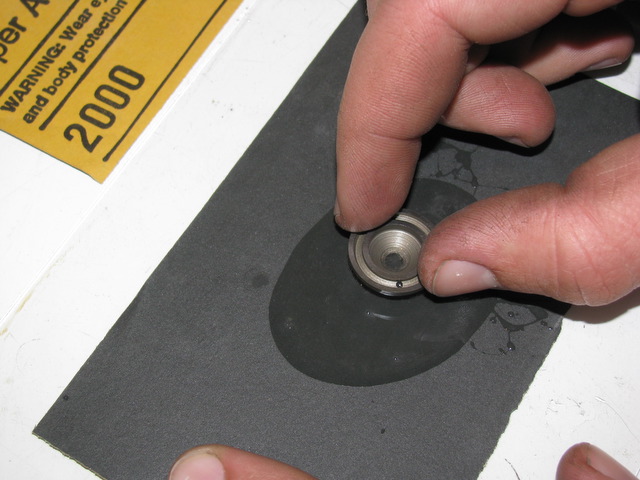
Start by lapping both sides of the intermediate spacer. Use circular oblong motions moving often to a different section of the sandpaper. Use water on the paper to speed the cutting action. Progress from one grade of sandpaper to the next finishing up with the 2000 grit paper dry. Lap both sides of the spacer. You must keep the metal as flat as possible. Finish up by lapping the bottom of the top injector half.
When you are finished, all signs of wear must be removed. Extremely flat and smooth sealing surfaces will assure leak free injectors.
Lay out all the parts for reassembly. Clean them again and use compressed air to blow out all the passages. You can never be too clean! Follow the proper procedures for reassembly, torquing, and pressure testing.