The plastic shift bushing is a very common part that needs to be replaced on older Mercedes. Can you believe it is the exact same part that was used on all models for over 25 years! It is an inexpensive part that can cause big problems if it breaks out. It looks easy enough to install but it is not!!! Trying to install this oversized bushing in a lever hole up alongside the transmission can be a REAL test of your patience. It is not only the bushing but the clips that hold the rod on that can also drive you crazy... Kent went to work to solve this common problem. The tools he came up with will eliminate the common headaches when installing your new bushings and could easily cut the time to do it by more than half! As seen on Cherry. CLICK HERE to watch the full video series on Kent’s R107 rolling restoration.
Product Details
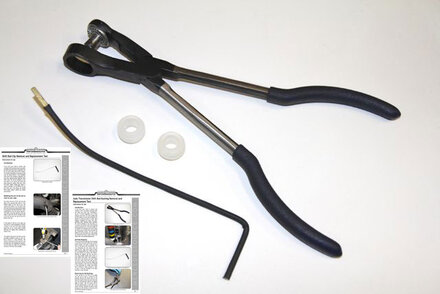
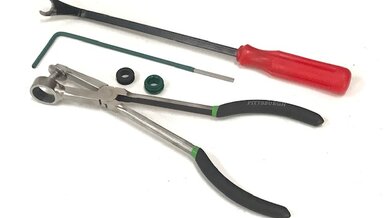
This complete kit includes the following:
- 1. Shift rod clip tool
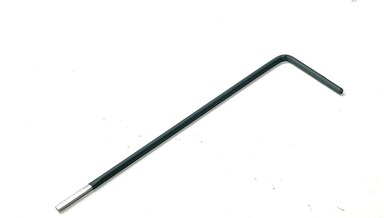
- 2. Bushing removal and installation tool
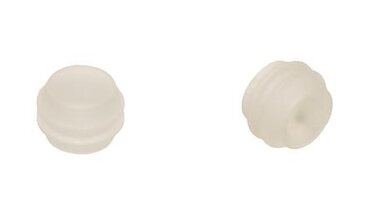
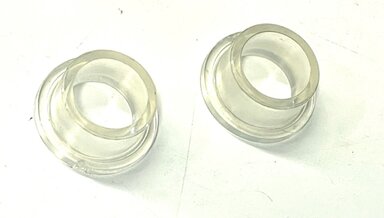
- 3. 2 new nylon bushings - measures: ( In the groove) 15.85 mm OD, 9.82 mm ID, width 13.8 mm
- 4. pouch of synthetic grease is ease in installation
- 5. PDF Instructions
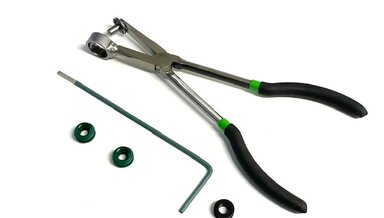
PLEASE NOTE: Some of the pictures show the end of the tool bent. We ship it straight as it works best in most applications. If you need to bend it to get better access you can easily do that yourself.White bushing
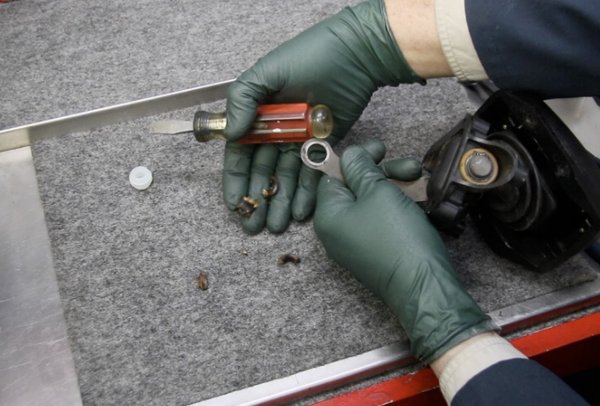
Here is what happens to these bushings when they get old and tired... They will just crumble and fall out of the holes in the metal shift levers.
_______________________________________________________________________________
How to view the PDF digital instructions:
Once you complete the purchase of this product you will be able to download the digital instructions immediately when you are logged in and on your personal account page (click on My Account). Any PDFs will show up under My PDF Manuals. You will be allowed three downloads, so please save the file on your machine for backup.
_______________________________________________________________________________
The Clip tool and clips are available for purchase separately as well as the bushings. To learn more about each one or to purchase individually please click on the appropriate link below:
BONUS: We are sending a small packet of special silicone grease along with your new bushings at no extra charge. Just wipe a small film of grease on the bushing before installation and you will be amazed at how much easier it will snap into the hole. Then put a little grease on the rod ends when you reinstall it on the levers. That will help to increase the life of the new bushing. Do NOT use too much grease as that will only result in more dirt and grime collecting on the bushing over time.
LIMITED WORKSPACE ALERT: You will have a real challenge on SOME models since there is so little room to work up alongside the transmission tunnel when replacing the forward bushing. The rear of the transmission will have to be dropped down in order to replace the bushing on the transmission shift arm. This is particularly true with the 190E 2.6 models. On some 190E 2.3 or 190D diesels there may or may not be enough room. On some other models, you may need to consider this extra step. If you have room to get the tool up alongside the tunnel and can manipulate the tool then you will not need to lower the back of the transmission. Here are some tips on how to get more working space:
- Remember you are not removing the transmission from the engine
- You are just "lowering" the rear of the transmission with it still attached to the engine
- So the engine and transmission drop down together
- No need to disconnect the driveline
- You will need a jack and a large piece of plywood to place between jack and transmission pan
- Go into the engine compartment and loosen the plastic fan shroud at the back of the radiator
- This will keep the fan from breaking the shroud when you tilt the engine
- If the fan has lots of clearance from the shroud, then you can skip the above step
- The rear of the exhaust system will also need to drop down as you lower the transmission
- Remove the rubber exhaust hangars but keep it tied up loosely with a rope
- Do not let the exhaust system just "hang" in the air - hard on manifolds and joints.
- Raise the transmission to take the weight of rear rubber transmission mount
- Remove the steel cross plate for the rear transmission mount
- Two bolts on each side of the plate that secure it to the subframe of the car
- Lower the transmission down as far as it will go using the jack
- Go slowly since you will be lowering the engine as well
- Lower it down almost as far as it will do
- Do not let the engine and transmission "hang" on their own
- Keep a little pressure on the bottom of the transmission pan with the jack
- Now you will have more room to work
- But for you 190E 2.6 owners it will still not be easy !!!
- Remove the clip and the rod
- Install the new bushing using the grease to get it to install easily
- Install the rod and clip, raise engine and replace the plate and tighten bolts
- Don't forget to reconnect the fan shroud if applicable.
Related Products:
1996 to 2002 Automatic Transmission Shift Lever New Bushing Install Kit
DOES NOT WORK ON THE V12. If your shift lever feels loose or is rattling, that is an almost sure sign that a bushing (or both)on the transmission shifting lever or the console shifter has disintegrated and fallen out.
1998 to 2005 W163 ML Loose Shifter Repair Kit
You can not believe how much trouble a loose or missing shifter rod bushing can cause.
Transmission Shift Rod Clip Removal and Installation Tool
If you have ever tried to remove and reinstall a shift rod attachment clip under your Benz you know how frustrating it can be.
Automatic Transmission Nylon Shift Bushing Set of 2
Set of (2). The number one cause of a loose or rattling shift lever is failed or missing shift lever bushings. Our upgraded bushings are made out of nylon and are much tougher than the original plastic type. No instructions or special tools included.
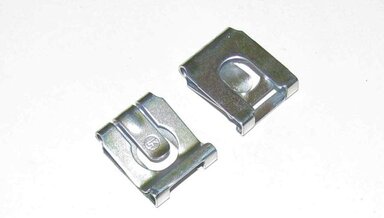
Transmission Shift Rod Retaining Clip X 2
These same clips are used on almost all Mercedes Benz Models from the late 1960s up into the 1990s. If you have lost or damaged one of your clips here is a chance to get replacements. Maybe good idea to have spares on hand. Sold in set of 2.
1972 to 1985 Automatic Transmission Shifter Shaft Replacement Bushings
Think age here. Many of these shifters on our classic Mercedes are starting to get loose inside the shifter, and when the old bushings fail, you will get a lot of slop side to side when you shift between gears. Note: These bushings are different from the bushing that go on the shift levers.