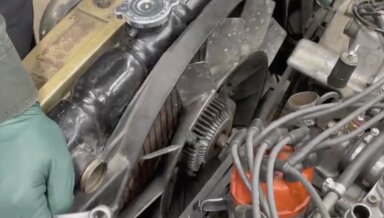
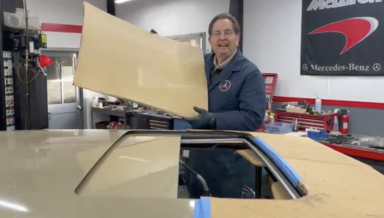
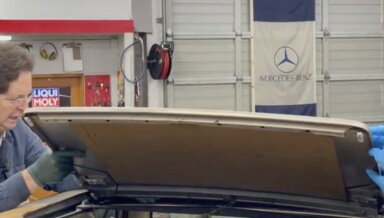
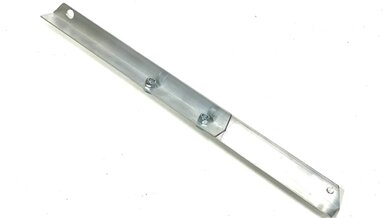
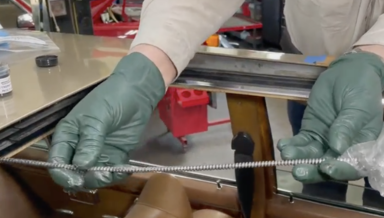
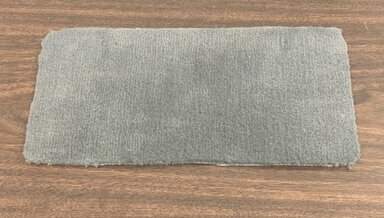
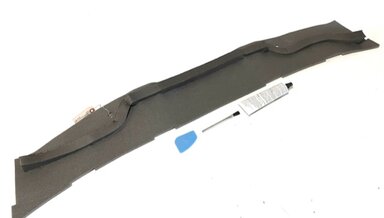
1972 to 1989 R107 C107 Rear Hood Seal OEM
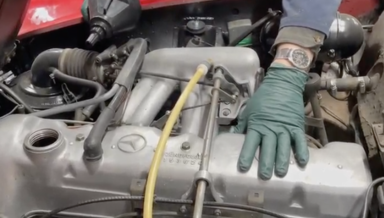
If you own an R107 most likely this will be torn, missing, or rotting away. This helps with engine cooling as well as prevents engine fumes from getting into the cars vents.
Kent's Factory Service Manuals collection is going on sale now. CLICK HERE.
If you own an R107 most likely this will be torn, missing, or rotting away. This helps with engine cooling as well as prevents engine fumes from getting into the cars vents.
Special purchase. Only four kits are available at this price. Unless your steering box is all worn out, these are the parts you need to replace to get your W123 steering tight again. Be sure to get a front-end alignment after installing these parts. No instructions are included for this kit.
New in 2023. This is "almost" ready to install. You will need to install some parts from your existing turbo charger once you remove it from the engine. Watch the video below for a full explanation.
This procedure is a must do anytime you install a new master cylinder or allow fluid to completely leak out of your master cylinder.
In this 30 minute instructional video Kent will use a 1972 300SEL 4.5 to show you how to remove the master cylinder with minimal spillage, how to install the tank and bench bleed a new master cylinder, and how to reinstall it with minimal brake fluid spillage while protecting your car's paint.
WARNING: MAKE CERTAIN your current injectors are blue/green at the top. A restocking fee will apply if you place an order in error. These are for the 4.5 engine only. See related products below for the 3.5. A video is worth a few thousand words.
Here is a 15 minute video that can really help you if you have small coolant leaks around your idle air valve. You will learn how easy it is to break the bolts when removing this valve, and your option to fix it.
In this 14 minute instructional video Kent will demonstrate how to remove and install a new thermostat in a 450 engine. Here you will see how tight it is to get install in a 300SEL 4.5, but other V8s will have better access.
In this 12 minute instructional video, Kent will demonstrate how to remove and replace the viscous fan clutch in a 1972 300SEL 4.5. Other topics covered will be cleaning and corrosion prevention. This video is included free with the purchase of our fan clutch install kit ( see below).
Are you dealing with any of these sunroof problems? Stuck roof, broken drive gears, bad cable, no lubrication, broken slides, headliner panel coming apart, installation problems, alignment, slow movement, headliner jamming, roof panel sits too low, and clutch spinning or not adjusted properly.
In this 33-minute instructional video, Kent will show you how to convert your old points ignition to an efficient modern electronic ignition. Rid yourself of those old high-maintenance distributor points forever.
In this 29-minute instructional video, Kent will show you how to convert your old points ignition to an efficient modern electronic ignition. Rid yourself of those old high-maintenance distributor points forever.
WARNING - WARNING - WARNING: BEFORE we ship this unit, we MUST have confirmation from you that you have removed the distributor cap, confirmed the size of your rotor ( see below), AND measured the points cam width and height. If your distributor is not exactly the same this kit WILL NOT WORK.
Most of the older 450 engine fan clutches are still original on most of the older unrestored V8 models from 1970 to 1980. If you are having problems with your 450 V8 running hot check the friction in your clutch. They are often worn out as they seem to never get changed.
This is seldom replaced. If you engine is taking over 15 minutes to get up to full operating temp then your thermostat is probably worn now. We got you covered with kit. We will get you the extra hardware, supplies and video instructions so you have the confidence to do this job yourself.
In this 18-minute instructional video, Kent will wrap up his 5-part series on fixing and servicing these old sunroofs. You will get to see just how well it works after proper repair, lubrication and adjustment. These are the subjects that are covered.
In this 20-minute instructional video, Kent will walk you through the steps of getting the steel sunroof panel installed properly back into the car's roof. The first step will require cleaning, inspection, and possible replacement of the plastic slides.
If you think your coolant hoses are "ok" they just may be, but it is what is hidden that could be a problem. When you remove those old hoses ( unless they have been replaced in the past 10 years) you may be shocked at what you find.
In this 23 minute highly detailed video Kent will show you to reasons why and some of the problems you will run into when you change these hoses on your own D-Jet engine. He will take the new parts and show you how to properly install them using the correct hose clamps, sealants and lubes.
We have been able to determine that most of the 500 series R107 and W126 of the early to mid 1980s have the same FID setup as the 380 engines.
Includes Kent's four detailed videos on every aspect of this job! This is our combination kit for DIY installation of a new front crank seal in an OM 616 four-cylinder and OM617 five-cylinder NON-turbo diesel engine. The price if purchased individually is $174.00.
I have hit my head so many times on the grill edge while working on R107 engines that I finally decided to do something about it while recently changing the fuel injectors on a 380SL.
In this 21 minute instructional video Kent will show you all his tips and tricks he used when doing an oil and filter change and a fuel filter change in his 280SL with the early 6 cylinder fuel injected engine.
In this 13 minute instructional video Kent will show you how to clean your sunroof cable tube, prep your cable for easy installation, lube the cable during installation, show preliminary clutch adjustement, and demonstrate how to get cable to engage the drive assembly using the power switch.
These are high quality German brand filters. Since mose of these cars are not driven regularly Kent recommends an oil change every 5000 miles or 2 years whichever comes first ( using quality oil) and a fuel fitler change every 10,000 miles or 2 years whichever comes
In this 24-minute detailed step-by-step video instruction, Kent will walk you through the process of how to successfully remove the old shocks and install new ones.
A great alternative to Bilstein shocks at almost half the price! Watch the video below as Kent explains why he put these shocks on his W113 280SL. These are special order parts and depending on supply issues it may take up to 5 days before they can be shipped.
This can do amazing things for your new fuel hose installaton on your old Benz engine. Watch the video to learn more. Sold individually in approximately 6 inch lengths.
Set of 8 correct size bolts and washers to spruce up the engine compartment of your D-jetronic V8 engine. Watch the videos to see how these actually look installed.
These engine supply fuel hoses are critical to the well-being of your engine. I have seen too many rotten and deteriorating hoses on these D-Jet engines that could easily lead to an engine fire, and they just do not get replaced when they should.
Good used sprocket and bushing as shown.
If you are looking for a way to really beautify your classic Benz engine compartment this could be it. These hardly ever get changed and most are stained and ugly. This is a genuine OEM part with rubber seals included. MAKE CERTAIN yours matches in size and shape before ordering.
In this 36-minute instructional video, Kent will walk you through the process of doing a complete fuel hose replacement and fuel injector service on a 1970 to 1975 Mercedes V8 engine with Bosch EFI electronic fuel injection.
If you are removing and replacing your M110 fuel injectors these are the seals you should have on hand. Always replace the rubber seals. I know it is possible to reuse the plastic sleeves but many times they are brittle and will be damaged upon removal.
Even if your engine is running "ok," but your hoses are 20-plus years old, you should replace them.
In this 9 minute instructional video, Kent will explain how to test your fuel accumulator to determine whether or not it has failed internally. A failed accumulator will make your engine hard to start when hot.
In this 14 minute instructional video, Kent will share with you the tools you will need along with some tips and tricks that will help you successfully remove a prechamber from the cylinder head. This can be done with the head on or off the engine.
Assortment includes 6 single-element brake and turn signal bulbs, 4 dual-element bulbs for the front marker lights, and 4 small tail light bulbs. Good idea to carry this assortment in the trunk of your car.
This is the actual carpet piece you will receive.
Brand new aftermarket blower motor as shown. Fits all R107 and C107 (SLC) from 1972 to 1989. Even if you motor is working you want to open up this area and inspect for hidden rust.
This is the most complete 1970 to 1975 V8 injector repair kit you can find anywhere.
In this 24 minute instructional video Kent will explain the process of how to bench clean and test your D-jetronic fuel injectors in your own garage or workshop once they are removed from the engine.
This will give you everything you will need ( except 12-volt power and cleaning fluid ) to bench clean and test your D-jetronic fuel injectors in your own garage or workshop once they are removed from the engine.
Includes Kent's four detailed videos on every aspect of this job! This is our combination kit for DIY installation of a new front crank seal in an OM617 turbo diesel engine. Price if purchased individually is $174.00.
In this 26 minute instructional video Kent will show you how to hook up a CIS fuel pressure tester to your older K-jectronic gas engine.
In this 10 minute instructional video Kent will explain why you want to "jump" your K-jet fuel pump relay, how to do it, how to find the location in you car, and why he prefers to have a long "switchable" jumper.
This xx minute video will take you step by step through the process of modifying your warm up regulator so you will be able to easily make adjustments to your cold start control pressure.
With the required pressure tank you will be able to individually test and clean our D-jet fuel injectors. Along with a 12-volt power source, you will need I gallon of cleaning fluid as described in the instructions.
Assortment of new interior bulbs as shown. These light up your dash, center console, glove box and shifter ( on some models).
Assortment includes the following:
Before you make this modification you should be very familiar with the function of the WUR and how its pressure adjustements affect the performance of the K-Jetronic fuel injection systems. The tools and supplies offered in this kit will allow you to modify your warm up regulator at home and it y